

How Do You Set Up a Carp Fishing Rod Properly?
Last Updated: October 29, 2026
Quick Summary
To set up a carp fishing rod, first match the rod's length and test curve to your water, then pair it with a baitrunner reel in a 4000 to 6000 size. Spool 12 to 15 lb monofilament main line, thread it through every ring, and build your rig from lead clip to hook bait.
- A 12-foot rod with a 2.5 to 3 lb test curve is the all-round choice for most beginners.
- Set the baitrunner light enough that a fish can take line freely.
- Fill the spool to about 2 mm below the lip to avoid tangles.
- Cut the hooklink to 6 to 10 inches for most bottom-bait rigs.
- Never cast with the baitrunner engaged, as the line tangles the spool.
Table of Contents
- Carp Fishing Rod and Reel Setup: Matching the Pair Before You Build
- Carp Fishing Line Setup: Breaking Strain, Spooling, and Line Threading
- How to Tie a Carp Rig and Attach It to the Main Line
- Carp Fishing Float Setup: Indicators and Bite Detection
- Setup Variations for Lakes, Rivers, and Long-Range Casting
- Safety Checks and Common Setup Mistakes Beginners Make
- Building a Budget Starter Setup and Stocking Your Bait Bag
- Frequently Asked Questions
Carp Fishing Rod and Reel Setup: Matching the Pair Before You Build
Learning how to set up a carp fishing rod starts with one rule: the rod and reel must match. A mismatched pair casts poorly, feels wrong, and can fail under load.
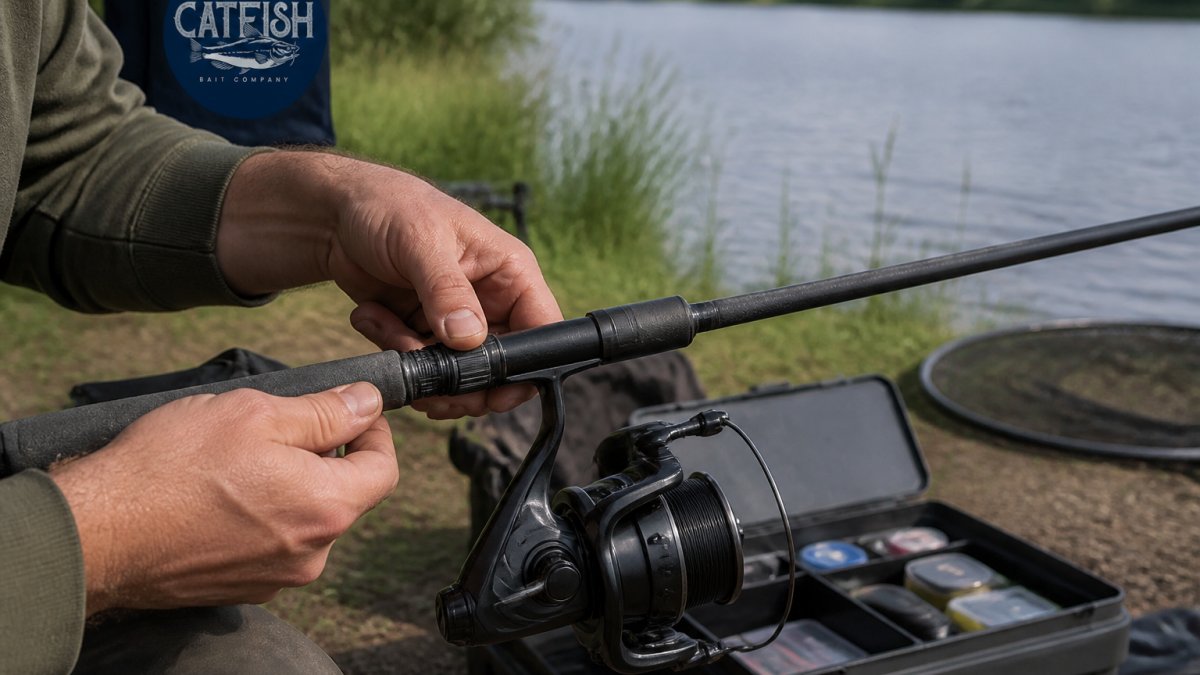
Rod Length and Test Curve: Reading the Numbers
A carp fishing rod is described by two numbers: its length and its test curve. Length runs from about 10 to 13 feet. Test curve is the weight needed to bend the rod tip to 90 degrees, usually between 2.5 and 3.5 pounds.
Match them like this:
- 10 to 11 feet: tight swims, small lakes, short casts
- 12 feet: the all-round choice for most beginners
- 13 feet: big open water and long-range casting
A common mistake is buying a 13-foot, 3.5 lb rod for a small pond. It casts a light lead badly and feels like a broom handle.
Reel Choice: Baitrunner, Drag Setting, and Spool Size
A baitrunner in a 4000 to 6000 size is a common choice for beginners.
Set your drag before casting:
- Tie the line to a fixed point and walk back.
- Tighten the front drag until the line pulls off with firm resistance.
- Set the baitrunner light enough that a fish can take line freely.
Spool size matters too. A 5000-size spool holds more line and casts farther than a 4000. Match the spool to your rod length, not to how it looks in a catalog.
Rod length and test curve should be matched to the water in front of you, not to the catalog photo.
| Rod length | Best for |
|---|---|
| 10 to 11 feet | Tight swims, small lakes, short casts |
| 12 feet | All-round choice for most beginners |
| 13 feet | Big open water and long-range casting |
| Test curve | Best for |
| --- | --- |
| 2.5 lb | Light leads, close range, softer bite detection |
| 3 to 3.5 lb | Heavier leads, longer casts, stronger hooksets |
Carp Fishing Line Setup: Breaking Strain, Spooling, and Line Threading
Line choice comes down to breaking strain and material. For most beginner setups, 12 to 15 lb monofilament main line is a solid starting point. It casts well, stretches to absorb runs, and costs less than braid.
Spooling goes faster with two people:
- Lay the spool on the floor, label facing up.
- Thread the line through the butt ring and reel seat first.
- Hold tension with a thumb and finger while a partner winds.
Threading the line correctly through every ring matters. Skipping a ring can cause the rod to load unevenly.
How to Tie a Carp Rig and Attach It to the Main Line
A carp rig is the terminal setup at the end of your main line: hooklink, hook, bait, and often a lead. The rig is only as good as its knots, so tie them carefully and wet each one before pulling tight. Follow the sequence below in order so nothing gets attached in the wrong place.
The Components, in Order From Rod to Bait
- Main line, 12 to 15 lb monofilament for a beginner setup.
- Lead clip or inline lead, holds the lead and releases it if the line breaks.
- Buffer bead or tail rubber, protects the knot and keeps the lead from sliding up the line.
- Swivel, the connection point between main line and hooklink.
- Hooklink, usually 15 to 25 lb, cut to 6 to 10 inches for most bottom-bait rigs.
- Hook, a wide-gape carp hook in size 6 to 10 for beginners.
- Hair and bait stop, the hair holds the bait off the hook so the hook stays exposed.
Step-by-Step Attachment
- Thread the lead. Slide the lead clip or inline lead onto the main line, followed by the buffer bead.
- Tie the swivel. Use a palomar or uni knot, wet it, and seat it against the bead.
- Cut and tie the hooklink. Cut 6 to 10 inches of hooklink material. Tie a hook at one end with a knotless knot, leaving a short tag end to form the hair.
- Attach the hooklink. Loop-to-loop it to the swivel, or tie it directly if the eye is large enough.
- Add the bait. Thread a bottom bait onto the hair and lock it with a bait stop. For a pop-up, add a small shot or pop-up weight on the hooklink to balance it.
- Check the mechanics. Hold the hooklink taut and pull the hook point across your palm, it should turn and catch, not drag flat.
Rig Styles: Multi Rig, Ronnie Rig, and Spinner Rig
Three rigs cover most beginner situations, and each solves a different problem.
- Multi rig, a stiff boom with a soft, replaceable hook section. You can swap hooks without rebuilding the rig, making it the most forgiving choice for a beginner. Start here.
- Ronnie rig, a pop-up rig built around a swivel and stiff hooklink. The hook sits above the bait and rotates into the mouth as the fish picks up the pop-up. Popular for wary fish and over silt or weed.
- Spinner rig, a spinning hook section that turns the hook into the fish's mouth as it picks up the bait. Excels on pressured fish and venues where carp have seen standard bottom rigs.
Attaching the Rig to the Main Line Safely
The connection between main line and rig is where most break-offs happen. Two rules keep it reliable:
- Match the hooklink to the main line. A 25 lb hooklink on 12 lb main line means the main line breaks first and you lose the whole rig. Keep the hooklink at or below the main line's breaking strain unless you are deliberately fishing stronger for a specific reason.
- Use a lead clip that releases. A lead clip or inline lead that drops the lead on a break lets the fish swim free of the weight. Check the clip is seated but not jammed before every cast.
Carp Fishing Float Setup: Indicators and Bite Detection
Bite detection is what turns a bite into a fish on the bank. A bite indicator is any device that shows when a fish takes line: a float, a bobbin, or an electronic alarm. Each is set up differently and tells you something different about what the fish is doing.
Float Setup: Depth, Shotting, and Reading the Float
A float rig is the simplest bite indicator and the best place for a beginner to start.
Corn Pellets - 2.2lbs or 1kg →
- Set the depth. Slide a float stop onto the main line above the float, then set it so the bait sits just off the bottom, the depth of the swim minus 6 to 12 inches.
- Shot the float. Add split shot below the float until only the tip shows. The bait should sink slowly, not plummet.
- Watch the float, not the water. A lift means a fish has picked up the bait and is rising. A drag or slow sink means it is moving off. A sharp stab is usually a line bite from a fish that has not taken the bait yet.
Buzzer and Bobbin Setup: Hanging the Indicator
For a buzzer setup, hang a bobbin on the line between the reel and the first ring. The bobbin is a weighted clip that hangs from the line and drops or rises when a fish moves it.
- Set the bobbin height so it hangs clear of the ground and does not touch the rod.
- Use a light bobbin in calm water and a heavier one in wind, so the wind does not move it.
- Watch the line as well as the bobbin. A slack line can fool any alarm, and a bobbin that swings without the line moving is usually wind.
A slow rise means a fish is lifting the lead. A sharp drop means it is running. A single bleep followed by nothing is often a line bite or a fish nudging the lead.
Electronic Alarms: Setup and Sensitivity
An electronic bite alarm sits on the rod and sounds when the line moves. Set the sensitivity so a steady wind does not trigger it, but a fish taking line does. Start low and increase only if you are missing indications.
- Mount the alarm on the rod butt or on a bank stick, depending on the model.
- Set the tone and volume so you can hear it from your fishing position.
- Test it by pulling a few inches of line off the spool before you cast.
Matching the Indicator to the Venue
- Small pond or tight swim: float rig, short cast, light bobbin.
- Large lake: buzzer and bobbin, longer cast, heavier bobbin in wind.
- River or moving water: float rig with a heavier shotting pattern, or a buzzer with a heavier bobbin to resist current.
Watch the line, not just the indicator. A slack line can fool any alarm, and the best bite detection combines a well-set indicator with a line you can see.
Setup Variations for Lakes, Rivers, and Long-Range Casting
Venue changes the setup more than most guides admit. A lake rig that works in still water behaves differently in current.
- Lakes: standard 12-foot rod, 2.5 to 3 lb test curve, light lead, bottom bait
- Rivers: shorter rod for accuracy, heavier lead to hold bottom, stiffer hooklink
- Long-range casting: 13-foot rod, 3.5 lb test curve, tapered main line, shock leader
On moving water, the lead has to grip. For more, read shore fishing fast moving rivers. Use a heavier lead and a flat-sided shape that resists rolling.
Safety Checks and Common Setup Mistakes Beginners Make
Most setup failures happen before the first cast. Run this check every trip:
- Line runs through every ring, no wraps
- Drag set and baitrunner tested
- Knots wetted and pulled tight
Watch out: casting with the baitrunner engaged sends the line out freely and tangles the spool. Always flip the baitrunner off before you cast.
Handle every fish with wet hands and a mat. Keep fish out of the water briefly, and never lift a carp by the line alone.
Building a Budget Starter Setup and Stocking Your Bait Bag
A beginner setup does not need to be expensive. See our tackle picks for beginners to round out your first kit.
A 12-foot rod and a 4000 to 5000 baitrunner are a common starting combination. Add 12 to 15 lb monofilament, a handful of rig components, and a landing net.
For bait, keep it simple and shelf-stable. Browse our carp bait ingredients to mix your own pack baits and groundbait. Our corn pellets are sold as a bait product and can be used for chumming. A bag of cornmeal makes a low-cost pack bait base. If you want a fish scent in your mix, our preserved ground fish is sold as a preserved product that requires no refrigeration.


One note on regulations: rules on using corn as chum vary, so check your local rules before you bait up.
Frequently Asked Questions
What reel and line should you use for carp fishing?
Match a baitrunner-style reel in the 4000 to 6000 size to your carp fishing rod, and spool it with 12 to 15 lb monofilament for most lake work. Heavier line (17 to 20 lb) suits long-range casting and snaggy venues. Fill the spool to within 2mm of the lip so line peels off smoothly, and set the baitrunner tension light enough that a taking fish can pull line without feeling resistance.
How do you set the drag on a carp fishing reel?
Tie the line to a scale or hold the rod tip up and pull by hand, then adjust the front drag until it slips at roughly a quarter of your line's breaking strain. With 12 lb line, that is about 3 lb of pull. The baitrunner (rear) drag should be looser still, just enough to stop the spool over-rotating. Recheck the drag after every fish and before each session.
How do you attach a carp rig to the main line?
Most setups use a quick-change swivel or a lead clip at the end of the main line. Tie a small loop in the main line, attach a lead clip or swivel with a knot you trust, then clip the rig's swivel into it. A lead clip lets the lead release if the line breaks, which protects the fish. Always wet the knot before tightening and test the connection with a firm pull before casting.
How far should your float be from your hook?
Set the float so the hook bait sits just off the bottom, usually 6 to 18 inches above the deck in 4 to 8 feet of water. Start with the float set shallow and adjust the stop knot until you get bites or the bait sits where you want. In shallow margins, a foot of clearance is plenty; over deeper silt, give the bait more room so it stays visible to passing carp.
Setting up a carp fishing rod rewards patience more than gear. Match the rod and reel, spool the line cleanly, tie knots you trust, and check your rig before every cast. When you are ready to simplify the bait side of the trip, Blue River Carp, Inc. offers veteran-owned, Indiana-made bait with a 12+ month shelf life, no refrigeration required, and scents that stay fresh in the bag. Get started with Blue River Carp, Inc. and spend less time managing bait and more time watching the indicator.


